
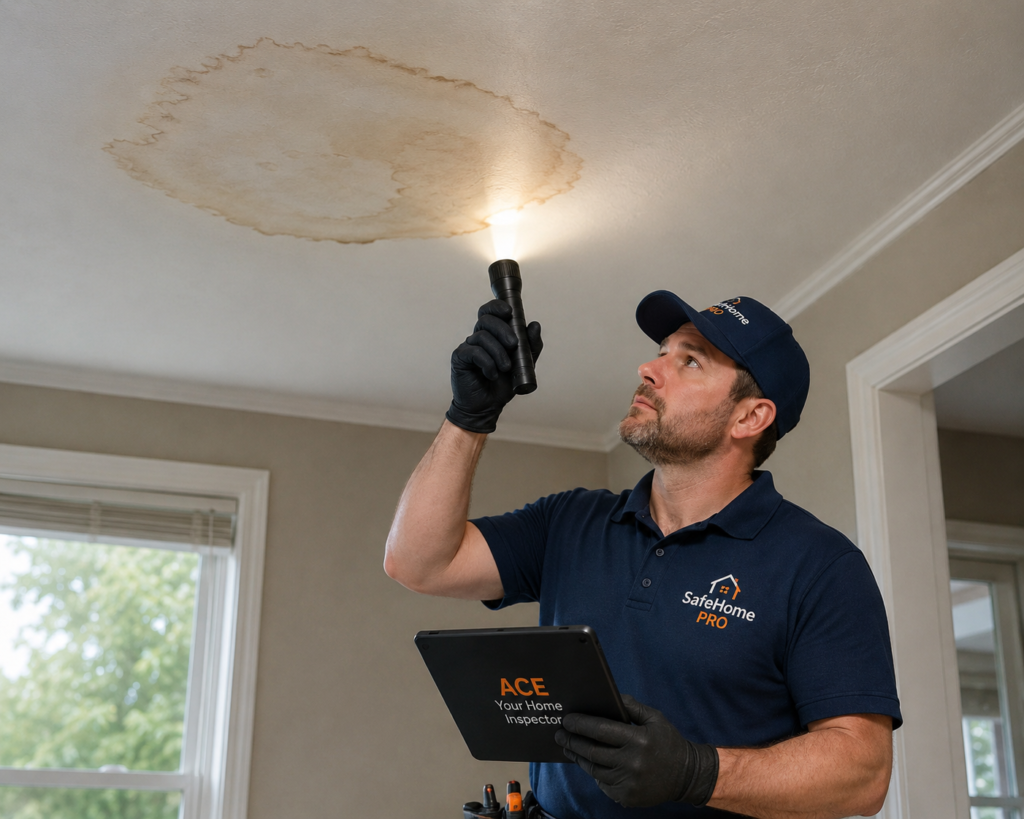
Water Stains on Ceiling: A Homeowner’s Guide to Causes, Severity, and Next Steps
Water stains on ceiling drywall are one of the most common home problems homeowners notice first — and one of the most misunderstood. The right read can save thousands. This homeowner-focused guide walks through what the stain is telling you, what likely caused it, when it’s urgent, and the practical steps to take next.
Reading the Pattern of a Ceiling Stain
Most ceiling stains start as a faint discoloration — a yellow halo, a brown ring, a damp-looking patch — and most homeowners spot them long after the original moisture event began. The pattern, edges, color, and location of the stain quietly tell you more than the stain itself. Before assuming the worst, it helps to slow down and look closely.
Edges. Sharp, ring-like edges usually indicate a one-time event that wet the drywall and then dried — the ring forms as moisture pulls minerals and tannins to the perimeter as it evaporates. Soft, fuzzy, growing edges suggest active moisture is still arriving.
Color. Yellow-brown rings are typical of iron, tannins from wood framing, or deposits from older roof decking. Reddish-brown stains often involve rust from a fastener or a metal flashing. Greenish or black tints can indicate biological growth, which means the area has stayed damp long enough for mold to colonize.
Location. A stain directly under a bathroom is plumbing-suspect first, roof-suspect second. A stain along an exterior wall near the eaves is roof or flashing related until proven otherwise. A stain in the centre of a top-floor ceiling, with no plumbing above, is almost always roof, attic ventilation, or condensation.
The single most useful question to ask is whether the stain has changed since the last storm or temperature swing. A stable, dry stain is a record of past damage. A growing or wet stain is an active problem.
Not sure what your ceiling stain is telling you?
Describe the color, edges, where it sits, and whether it’s grown — ACE will walk you through what the pattern likely means and the right next step, in plain language.
What Typically Causes Water Stains on Ceiling Drywall
Ceiling discoloration almost always comes from one of five sources. Knowing the short list narrows the investigation quickly.
1. Roof leaks
Aging shingles, lifted flashing around chimneys, plumbing stacks, skylights, and vent pipes are the most common roof-side sources. Water rarely drips straight down — it tracks along rafters and trusses, often emerging on the ceiling several feet from where it actually entered. Roof-leak stains tend to appear or grow during rainstorms or rapid snowmelt.
2. Plumbing leaks
A pinhole supply leak, a slow-draining tub gasket, a failed wax ring under a toilet, or a sweating waste line behind drywall can all produce ceiling stains. These are timing-independent: the stain grows whenever fixtures are used, not when it rains. A second-floor bathroom over a stained ceiling is a classic suspect.
3. HVAC and condensate lines
Air-conditioner condensate pans overflow, condensate drain lines clog, and uninsulated supply ducts in humid attics can sweat enough water to drip onto drywall. These stains often appear or worsen in cooling season.
4. Attic condensation
In cold climates, warm humid air from the living space can rise into a poorly-ventilated or under-insulated attic, condense on the cold roof deck, and rain back down. The pattern is broad, diffuse staining that tends to recur on the coldest weeks of winter, with no rain trigger. See our attic moisture signs guide for what this looks like in the attic itself.
5. Ice dams
In snowy climates, heat escaping into the attic melts roof snow that refreezes at the cold eaves, forming an ice dam. Water then backs up under shingles and into the home. Ice-dam stains appear in late winter, often along exterior walls, and are sometimes paired with icicles outside.
If the stain is worse during rain or snowmelt, suspect the roof. If the stain is worse during normal household water use, suspect plumbing. If it’s worst on the coldest days of winter, suspect attic condensation or ice dams. If it’s worst in summer, suspect HVAC.
How to Judge How Serious a Ceiling Stain Is
Not every stain is an emergency. Most are not. The severity ladder below is the same one experienced inspectors use when they walk into a room and look up.
| What you see | Likely severity | Typical next step |
|---|---|---|
| Small dry stain, no growth in months, ceiling firm | Low — historic | Photograph, monitor, repaint with stain-blocker |
| Stain expanded after recent rain | Moderate — active | Identify source, attempt to stop water, schedule a roofer |
| Soft or sagging drywall, paint bubbling | High — saturated | Stop using room if heavy, controlled puncture to drain, professional same-week |
| Bulging ceiling, audible dripping, water pooling | Urgent | Clear area, place a bucket, call a roofer or plumber today |
| Black or fuzzy growth around stain | High — biological | Avoid disturbing, ventilate, get an assessment |
The two patterns that escalate quickly are sagging drywall and the smell of wet, musty material. A sag means the gypsum has absorbed enough water to weaken — the safest move is often a small, controlled puncture with a screwdriver near the lowest point of the bulge to relieve the pooled water before the entire section fails. Place a bucket and tarp first.
What Homeowners Can Investigate Safely
Before paying anyone, work through the steps a careful homeowner can do without tools or specialized knowledge. The DIY home inspection checklist has a fuller version, but for a single ceiling stain the short list is enough most of the time.
- Mark the edges of the stain in pencil and date the photo. If it grows, you’ll know within days.
- Check what’s directly above the stain. Bathroom? HVAC equipment? Roof valley? That’s where the investigation focuses first.
- If accessible, look in the attic with a flashlight after rain. Wet rafters, dark sheathing, daylight through gaps, or matted insulation tell you the source area.
- Test plumbing logically. Run only the upstairs sink for two minutes — check the stain. Run only the tub. Flush only the toilet. Each test isolates a fixture.
- If the stain blooms or worsens during rain, the source is upstream — almost always roof, flashing, or gutter overflow at the eaves.
- Touch the ceiling lightly through plastic or a glove. Cool and damp = active; dry and stable = historic.
- Photograph the stain, the attic above it, the room below, and any obvious water path. These photos help any pro you eventually call.
Don’t paint over an active stain hoping it disappears, don’t walk on a wet drywall ceiling from the attic side, and don’t cut into drywall around recessed lights or ceiling fans without first turning the breaker off. Water tracks along wires.
The Point Where DIY Stops
Ceiling stains move from a homeowner-investigation problem to a professional-call problem when one of these is true:
- The stain has grown more than once and you cannot identify the source.
- You suspect a plumbing supply leak (continuous, no rain correlation, sometimes audible).
- The drywall is soft, sagging, or actively dripping.
- You see active mold growth (more than the size of a quarter, or recurring).
- The roof is steep, two or more storeys, or icy — attic and roof access become safety calls.
- The home is older and you suspect knob-and-tube or aluminum wiring near the wet area.
Roofers handle exterior diagnosis and repair. Plumbers handle pressurized supply leaks and waste-line gaskets. HVAC technicians handle condensate, sweating ducts, and AC pan overflows. For complex cases — multiple stains, mixed signals, or older homes — a full home inspection is the most efficient way to map the problem before specialists are dispatched. The U.S. Environmental Protection Agency’s mold cleanup guidance is a useful external reference for thinking about contaminated drywall.
Frequently Asked Questions About Ceiling Stains
Mark the perimeter in pencil, date the photo, and check after the next rain or shower-heavy day. A stain that doesn’t change is historic. One that grows or darkens is active and worth investigating now.
Only after you’ve confirmed the source has been stopped and the drywall is fully dry. A stain-blocking primer (BIN-style shellac) seals the discoloration so the topcoat doesn’t bleed through. Painting an active stain only delays diagnosis.
Small areas (a few inches around a known leak that’s been stopped) are reasonable for a confident DIYer once power to nearby fixtures is off. Larger areas, sagging ceilings, or any suspicion of mold or asbestos in older homes belong to a remediation professional.
Not necessarily. Mold needs sustained moisture — usually 24-48 hours of dampness or longer. A stain from a one-time event that dried quickly often has no biological growth. Recurring stains, fuzzy edges, or a musty smell are different.
Winter-only staining is usually attic condensation or an ice dam, not a roof leak. The fix is upstream — air sealing, ventilation, or insulation — not shingles. Our roof leak vs condensation guide explains the difference.
Costs vary widely. A loose flashing might be $200-$600. A failed plumbing gasket can be $300-$800. A localized roof repair $500-$2,500. Major shingle work, attic ventilation rebuilds, or remediation can run several thousand. Catching the source early usually keeps it on the lower end of these ranges.
Most policies cover sudden and accidental water damage (a burst pipe, a storm-driven leak) but exclude long-term seepage and gradual damage. Document everything early — photos, dates, professional estimates — before assuming a claim either way.
Continue Reading
Pages homeowners read next when they’re working through a ceiling-water issue.
The full plain-language hub on home moisture — where it comes from, what it does, and how to read it.
Open the hub ›How to tell historic deposits from active staining, what causes brown discoloration, and the right repair sequence.
Read guide ›The full early-warning checklist — what homeowners can spot before damage spreads.
Read guide ›What causes ceiling paint to blister, how serious it usually is, and the order of repairs.
Read guide ›Timing, location, and attic clues that tell the difference between a leak and a winter condensation pattern.
Read guide ›What attic moisture looks like, what causes it, and how to do a basic attic check before calling anyone.
Read guide ›A free, room-by-room walkthrough homeowners can do every season — the easiest way to catch problems early.
Open the checklist ›Not Sure What Your Ceiling Stain Means? Let ACE Take a Look.
Describe what you’re seeing, and ACE will walk you through what the pattern usually points to and what your next step might be — in plain language, without scare tactics.